Have you ever thought of creating an original video using royalty-free videos? Maybe you want to create a video on multiple devices, like a desktop at home and a laptop at the office?
In
most cases, you probably download video editing software to do this. But this
time, you don't have to do this as you can easily edit the videos from the web
with FlexClip Video Maker.
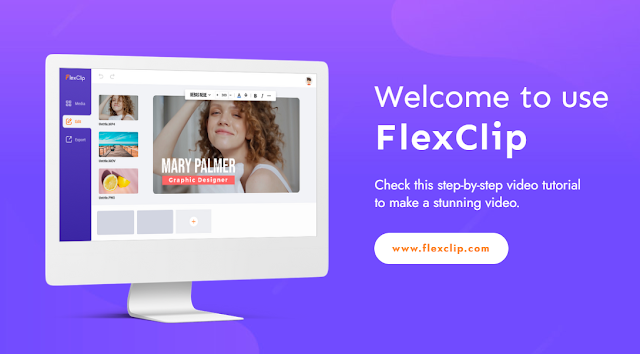
What is FlexClip?
FlexClip
video maker is software that allows you to create and edit videos from your web
browser easily. Unlike the software installed on the PC, this tool can be used
on any computer with a web browser. Also, as the videos created are on the
FlexClip server, you can continue editing them from another terminal.
These are some of its features:
l No need to download
it.
l You can filter the
video.
l You can create a
slide show with multiple photos.
l Features include
video and music trimming, effects and narration, watermarks, and more.
l Countless
royalty-free stock media like videos, music, and photos
l Picture in picture
(floating video).
l It supports screen
recording and video conversion.
Without
a doubt, a suitable tool for producing simple videos, such as promotional videos,
to be published on social networks or on websites.
How to create a video
with FlexClip
On
this occasion, we will create a straightforward video connecting the title
video, two short videos, the final video, and the background music. Of course,
more advanced editing is possible, but this demonstrates that a video can be
created in a simple way.
1. Start your creation
To
make a video, you have to start by creating a project. A project is like a
workshop to make videos. It is an image of preparing a workshop and creating a
video in it. We are going to create a video from a template, so click on the “Create
by Templates” button and select the list of video templates to create.
Otherwise, click on the "Start from Scratch" button.
2. Import media
(videos, photos, etc.)
Select
the Media option in the project. If you prefer to upload your own videos, click
on "Local Files," and select a local video file and upload it.
Suppose you want to use the videos provided by FlexClip, select the "Video”
tab, and choose one of the available videos. You can also click on the
"Recording" option and choose to record the screen or record the
webcam.
3. Insert text
As
the video title, create a video that displays the title characters at the
beginning of the video. As the final video, create a video that shows the last
characters at the end of the video.
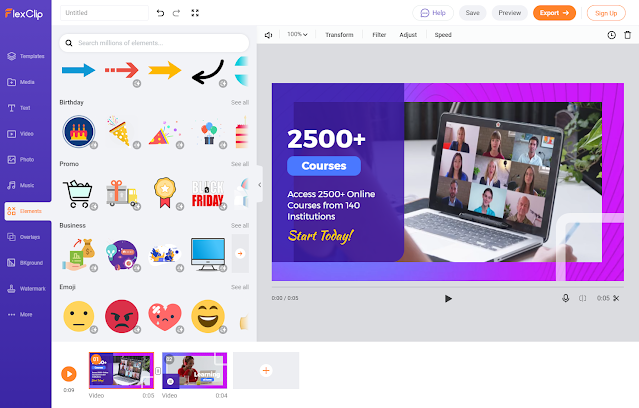
Select
a black background and choose the "Text" tab from the menu on the
left. There are many text patterns available, so choose the one you like. You
can double-click on the text in the preview on the right.
4. Add music
Suppose
you want to use the music provided by FlexClip, select "Library," and
select a piece of music from the available ones. If there is no sound, it will
be a lonely video, so add music. To do this, select "Music" from the
menu on the left. If you like to upload your own music, select "Browse
Your Music" and choose a local music file on your computer. Keep in mind
that they are classified by category and gender, and you can also search by
keyword.
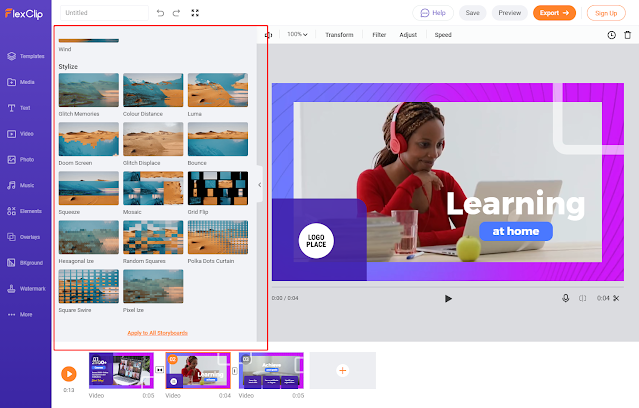
5. Add transitions
The
videos are almost completely due to work done so far. However, switching
between videos has no effect and changes quickly. That's not good, so you need
to set transitions (effects) to switch between video clips. By applying a
transition, the joints of the video will change coldly.
Click
the joints of the video you want to transition to. Select the transition you
like and click Apply. When you set the transition, the video stitching icon
changes. Set transitions for other video joins in the same way.
6. Export the video
Here
comes the end of video creation. Check the finished video and finally export
the video file. You can click the play button to see how the clip has turned
out.
Check
the content of the video and, if this works, click "Export." Select
the resolution of the exported video. (Besides MP4, it can also be exported in
GIF format.) The selectable resolution is only 480p for free use. However, you
can export in 720p or 1080p with the paid versions. After setting the video intro,
name, and creator, click Export.
Price
The
pricing screenshot shows that the free version (free plan) has more
restrictions than the paid version. If you want to enjoy all the resources and
features, a business plan is excellent. You can choose a plan according to your
needs.
Summary
This article introduces how to use the FlexClip video maker, explaining the procedure to create a simple video. So, if you like it, you should know that FlexClip has more than 1 million multimedia resources such as videos and music. Also, all of them are free of copyright.
You
can start testing the free version to create a video in minutes. After trying
it, the safest thing is that you want to switch to the paid version to get more
out of it. Go for it!


.png)
.jpg)


No comments:
Post a Comment